![Contact details [go to contact page]](shared/images/contact.png)
Advanced Guitar Setups


Sometimes no matter where you set the truss rod and the bridge height you can't get a comfortable action on your guitar without the strings buzzing. More often than not it's down to the frets themselves not being level.
It can be hard to tell whether your frets are misbehaving but to the trained eye it's easy to see when you sight down the neck. Even a subtle hump will cause fretbuzz trouble.
How's that happened then??
It's because the timber of the neck has mildly warped. It's very common to see a neck warp, it doesn't matter how expensive or how old/new your neck is - it's timber and it will still change shape! A piece of timber that long with that much pressure on it is bound to misbehave!
Another reason for uneven frets may be due to the frets loosening
-
> Read more about loose frets
How can frets become loose?
Frets can come loose and start to lift up in the fret slots cut into the fingerboard, this happens when the timber of the fingerboard dries up. Frets have a small barb which is designed to help the fret stick in the fret slot.
Most people "oil" their fingerboard with oils derived from trees such as Lemon oil, teak oil or Almond oil to stop their fingerboards drying up. I soak almond oil into my rosewood fretboards, it's very nourishing. If the frets have been installed poorly in the factory then it's more likely that the frets will pull out of their slots.
Here's a fretboard I've oiled only half way up the neck!

If your guitar is found to have loose frets, this needs to be sorted before the frets can be levelled. This isn't too hard to sort out luckily. For a small extra charge, I put extra runny superglue down into the fret slots to solidify them, clean up the excess glue and then continue with the fret dress on some stabilised frets!
The timber in your guitar neck reacts to temperature change and humidity change all the time and unfortunately can develop these humps or dips - it's just what timber does.
Instead of removing all your frets to true the fretboard timber, I take the humps or dips out of the fret tops. This process also removes fret wear marks left by the strings under the most used frets.
Understanding Uneven Frets or Fretboard
Here's a fretboard with a dip

If you fret a note in that dip the string will start to touch on the higher up frets which are taller too, this will sound like a string rattle - Fretbuzz.
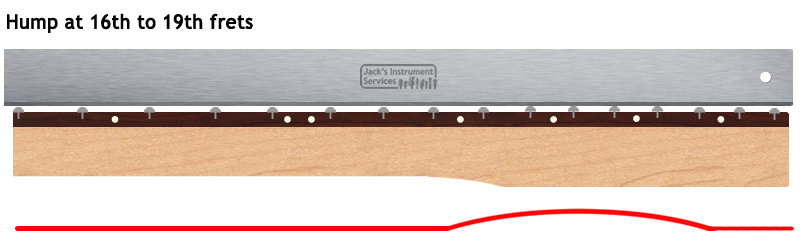
Similarly, here's a fretboard with a hump, if you fretted a note just below this hump at about 13th fret the string would start to buzz on the taller frets again with that nasty fretbuzz
What the fret dress does is flatten the tops of the taller frets until they are all the same height.
This trues the fingerboard and allows for the perfect setup afterwards.

The Fret Dress Process
Here's how it's done
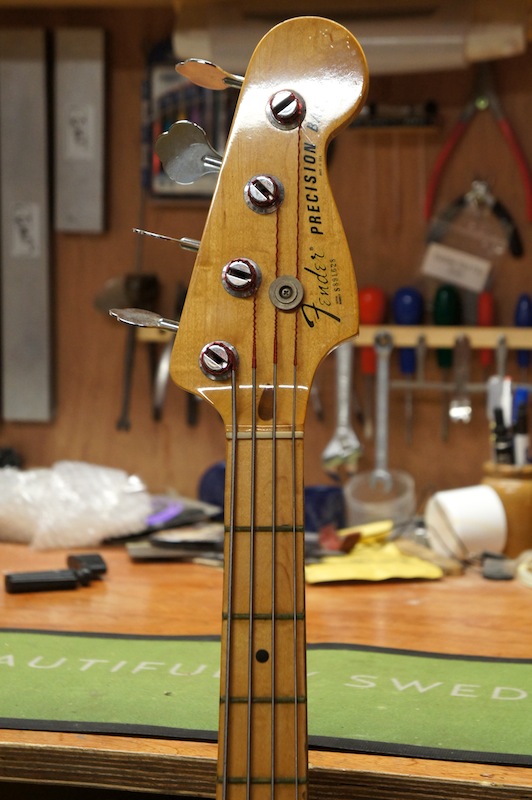
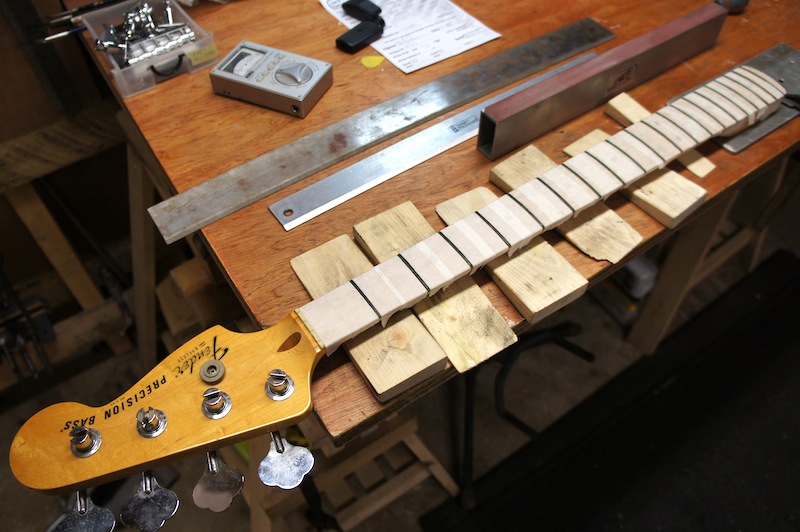
I'm working on this Fender USA Precision bass which hasn't been played for a long time! The frets need levelling and seriously need that oxsidisation removing. Grim!


Look at how rusty the frets have gotten!

Preparation
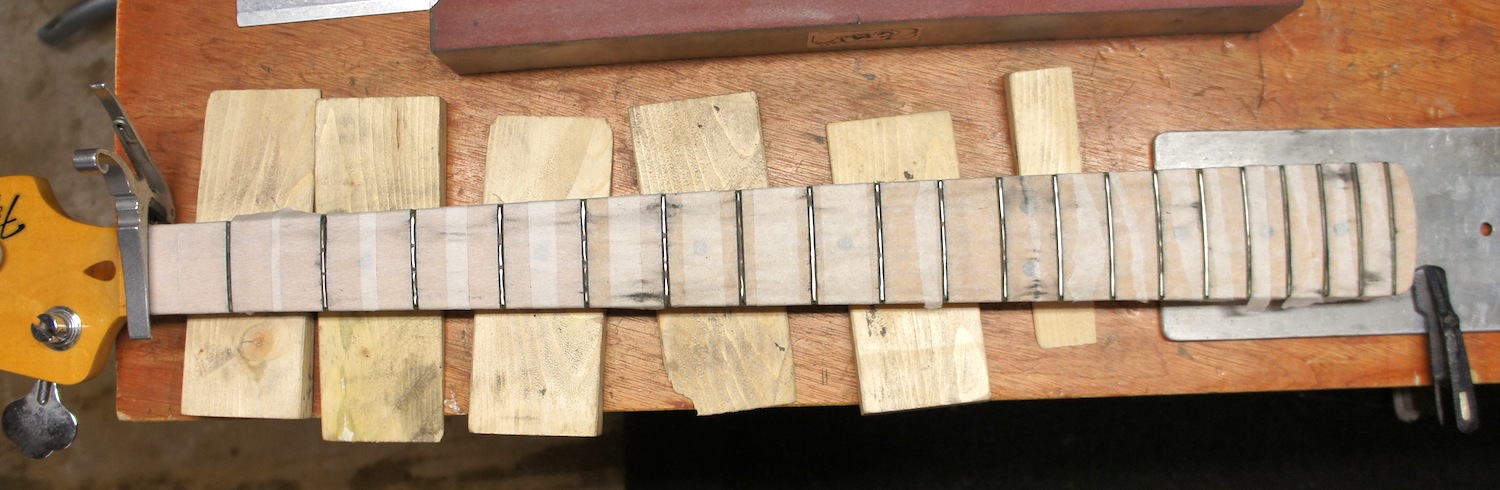
First off I remove the neck from the bass. This makes it easier for me to work on the guitar. I attach it into a special aluminium jig I have made myself which keeps the neck solid while I'm working on it.

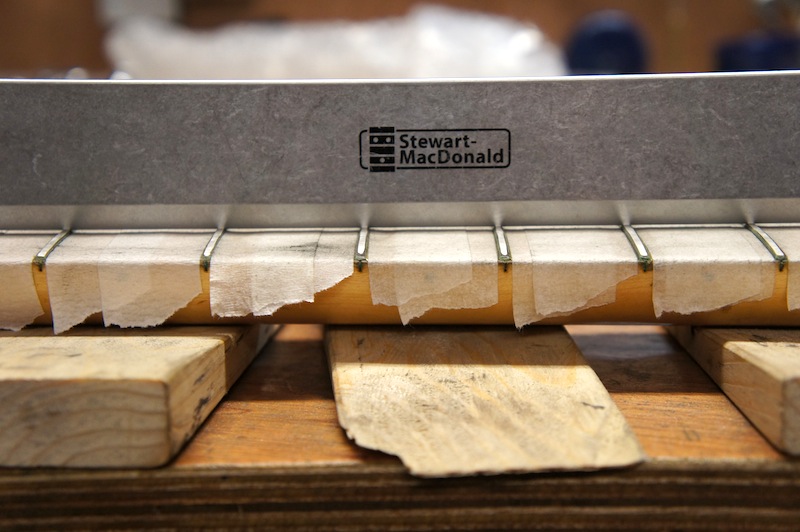
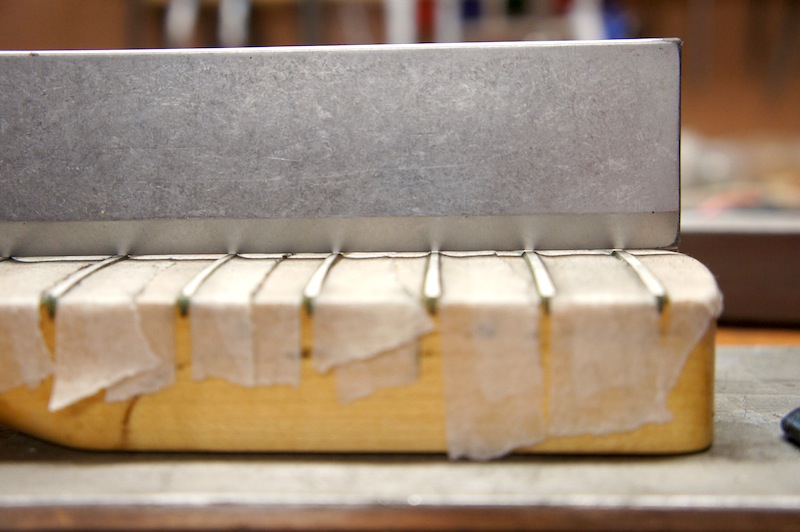
This fretboard is lacquered Maple. To protect the fretboard, I mask it off with Low-Tack masking tape
This will guard it from scratch marks and a hell of a lot of dirt!

Ok, so next I need to flatten the neck as best as possible. Obviously I cannot perfectly flatten the neck as it has some humps. I'm going to set the general curve of the neck so that it's straight by turning the truss rod.
The neck is checked for straightness from each side and the centre of the neck. This is the first glimpse of how the neck is shaped when compared to the precision-ground straightedge

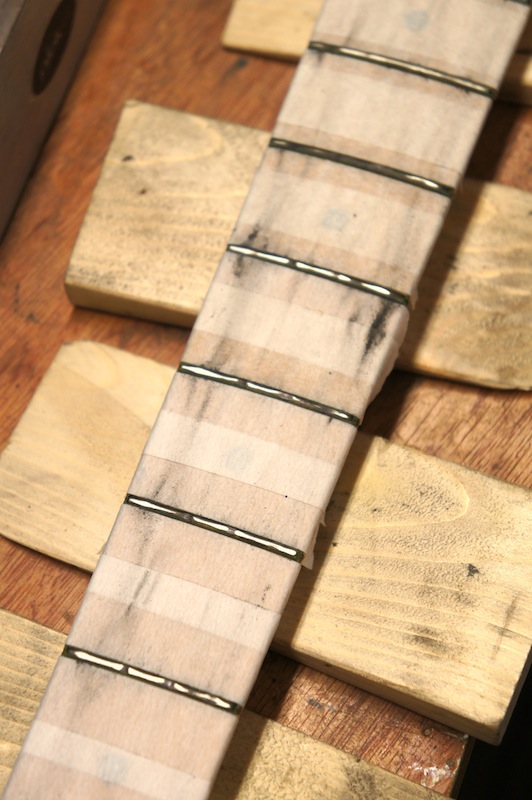
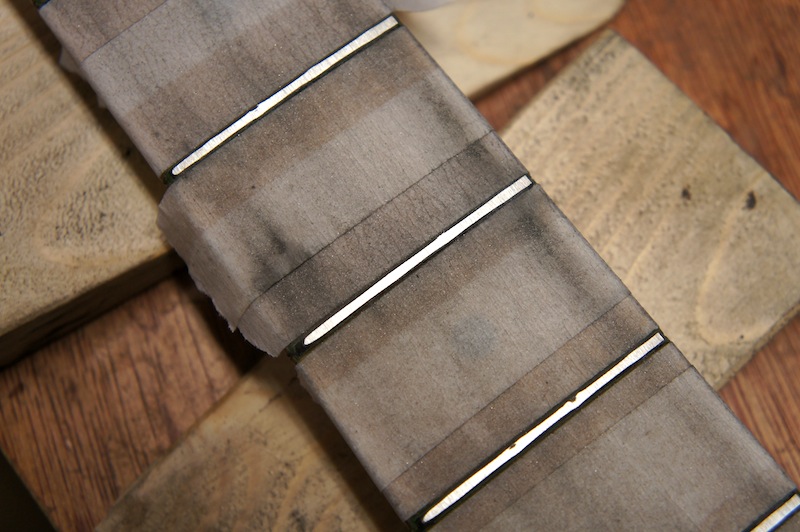
Next step is marking the frets. This permanent marker makes it really easy to see when you have removed material from the top of the fret
Each fret is marked in this way. The idea is to lightly sand until all of the marker pen has been removed leaving the fret tops perfectly true

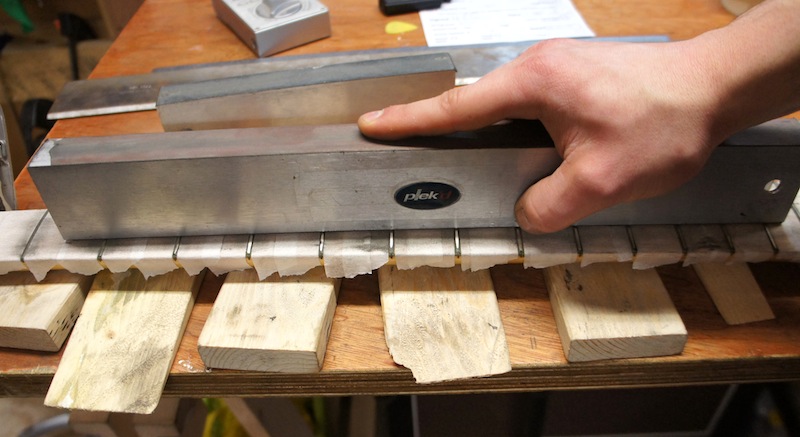
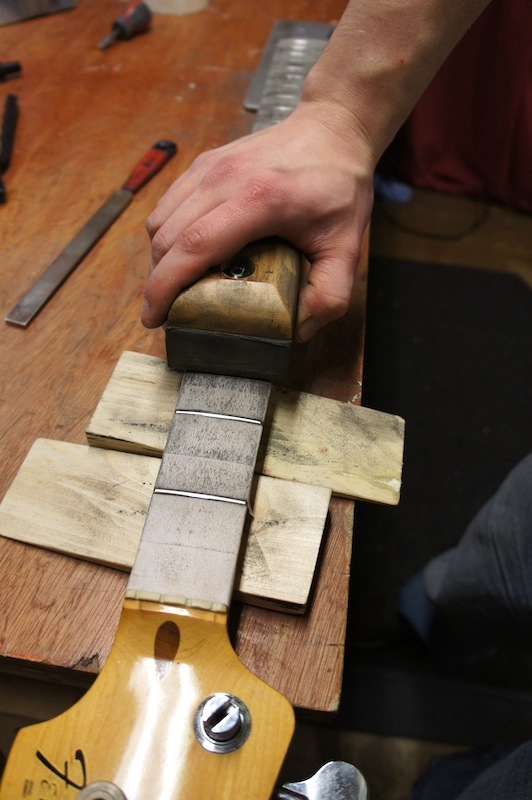
The back of the neck is supported now with these wedges. This means that the neck cannot bend when under the pressure of my sanding beam. Once I have supported the back of the neck I check the flatness of the neck again with the straightedge and re-adjust the truss rod if needed
Fret Levelling
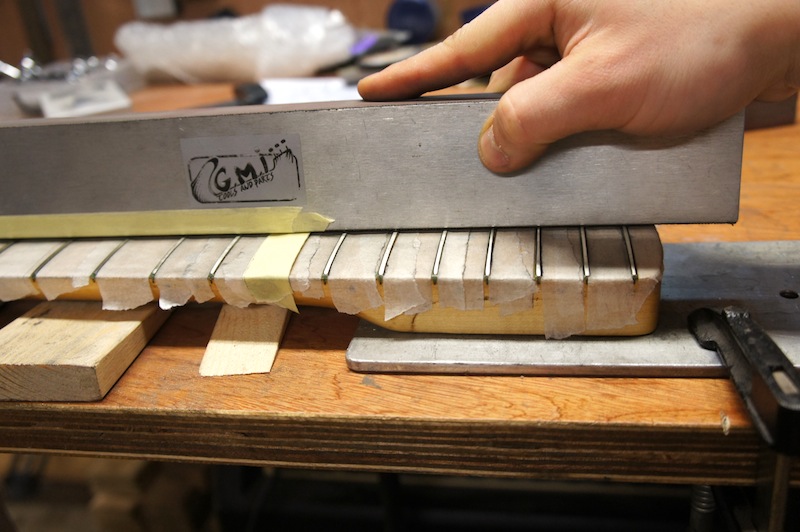
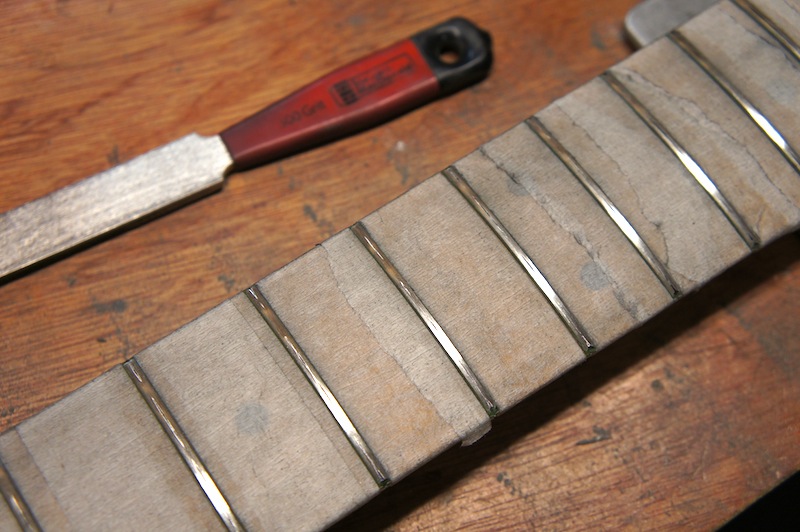
This is one of my fret levelling beams, it's precision ground flat and has 2 grades of emery paper attached on - coarse and fine. A specialised sanding block

Its time. This is the first pass of the fret levelling beam. You can see the low spots where the abrasive emery paper hasn't touched. 7th fret and 1st fret appear to be lower than the rest. You can clearly see the fretwear made by the strings in each of the frets - some of the string dents are quite deep and will require a good bit of elbow grease!
Dealing with Fret Wear
Close up of frets 3 to 8. Fret 4 has a huge fret wear string dent under where the D string would be and you can also see that the 7th fret is generally lower down than the adjacent frets
Gear shift - time to move to the more abrasive paper now to level the frets and remove the fret wear
Fret dust piles start to gather!
This is 3rd fret, got some really deep string marks, it looks like the bass has been dropped on its front and the string has pressed into the fret here. Because of how deep it is, I will have to keep dressing the frets lower

I'm getting close to a perfect fingerboard now. Although I'm always stopping and checking with the straight edge I like to shift back down a gear to the less abrasive sanding paper, re mark the frets and press lighter to really finely tune the fret levels.

Here's frets 5,6 and 7. That low 7th fret has some fret wear on still however I have ground away the centre of the fret so I will call it quits here. The reason is that my fret crowning file will round off the edges of the fret so that string wear to the side of the fret will disappear leaving just the levelled centre of the fret.
The fret dress was a little heavier than I first expected due to the fret wear string marks being so deep. I only take off the absolute minimum to get the board right, yes of course I could continue sanding down the frets but this would really alter the feel of the bass. Low frets aren't favoured by everyone.
Of course there is a finite number of fret dressing you can do to a bass before there are no frets left! In that case it would be time for a refret - complete fret removal and a fresh set installed. According to the owner, this Precision bass is having its very first fret dress. since coming out of the factory
Precision Checking for Straightness
I like to swivel the straight edge to see where the frets create the most friction. I fine tune the truss rod so that the neck only just grabs the frets as I swivel the straightedge. When I check each side of the fretboard any slight variation in the mount of friction means theres a gradual hump somewhere and I need to go back to the abrasive beam again.
Every part of the neck is tested with the straight edge. The radius of the fretboard is carefully monitored so that the neck curvature is kept the same
*Note the camera zoom seems to have played a trick on how my straight edge looks! I guarantee you its machined perfectly flat!
Adding Fallaway
The last stage in levelling is adding the "Fallaway"
The fallaway is a deliberate slope added to the last few frets, it covers the frets which are over the body. This is to counteract the pull of the neck. When strung up, the neck will bend forward, in time this secured-to-the-body part of the neck will bend upward. The fallaway I add future-guards for this effect
Close up showing the fall away when compared to the straightedge
Fret Top Re-Profiling
The next stage is "re-crowning" the fret tops with this specialist Stewart MacDonald file. My favourite fret file is the StewMac 300 grit Diamond edge fret file.
The file has a curved profile machined into it which adds the perfect crown to the fret tops. The file has real diamond dust attached inside the concave edge which is the abrasive - it will never go blunt!

Here's old faithful in action
My index finger gets very tired by the last fret...

And here's what the fret file does.
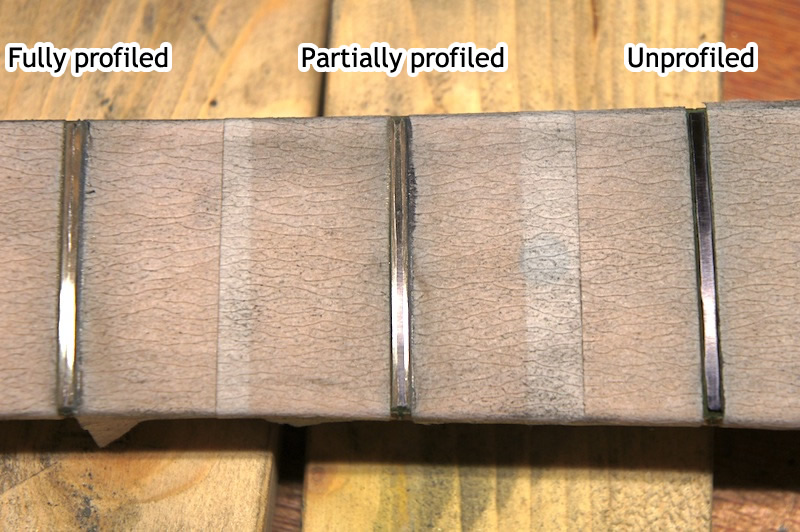
It starts at the edges and removes material until it's the perfect rounded profile. You can see on the right a fret which I haven't touched with the re profiling file yet. In the centre I have started work on - its partially crowned. On the left is a crowned fret. Note the very small "land" I leave in the middle of the fret? This small "land" is the exact height left by the levelling beam and I don't want to lower the fret any more than that.
The whole fretboard is painstakingly done the same. I try my best to get each fret identical and with the same amount of "land" left in the centre.
Fret Polishing and Scratch Mark Removal
Meet my fret polishing block #1.
This is the first stage in how I polish my frets. The block is loaded with 600 grit paper and is foam backed, this block concentrates on removing the sanding marks from the levelling beam.
Polishing block #2 is responsible for removing the scratch marks from the sides of the frets and taking the frets to a higher luster
It's backed with 1200 grit paper and is on an extra spongy foam block. I finish up by sanding sideways on the frets, this directs the ever smaller sanding marks to now be in the same direction as the frets

Here you can see the difference between polishing block #1 (600 grit) and #2 (1200 grit). The finer the grit the more light is reflected on the smoother surface.

Final Fret Buffing
The last stage of polishing is from my Dremel rotary tool which is kitted out with custom made polishing wheels. They get 2 stages of polishing so that they don't overheat. If the frets are allowed to over heat it can melt surrounding lacquer or unseat glued in frets!

The middle fret here hasn't been polished with the Dremel tool yet and therefore it's still got the scratchmarks from the 1200 grit sanding block.
See the difference?

Clean Up
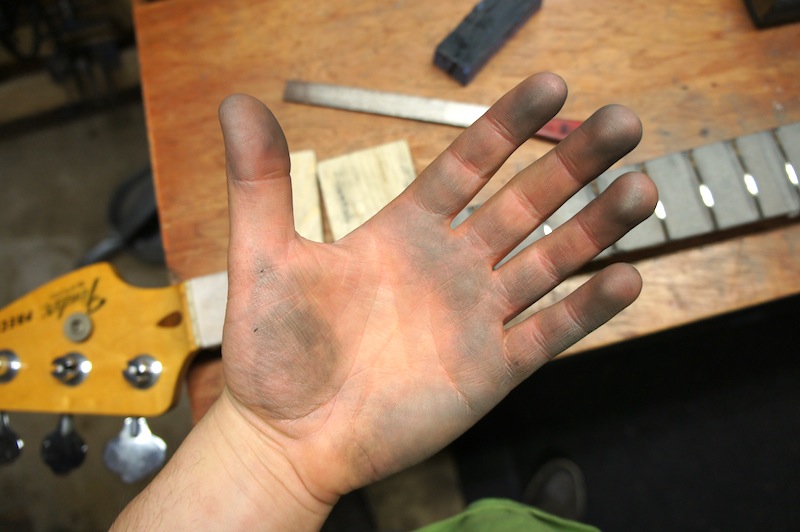
So this is what my hands look like after a fret dress! Covered in fret dust and polishing compound! Before I get any further I'd better wash my hands...
The big reveal
That low tack masking tape has worked well, all that dirt would be on the fretboard if I hadn't put it on.

Nice polished frets!

Perfectly level and true fret heights make way for the perfect setup.

Finished → Setup
With the frets taken care of and perfectly straight I can now set up the guitar without any fret buzz at all.
It really makes the setup process easy!
One of my Advanced setups like this next goes on to receive the full works of a Standard Setup to make the guitar play with a comfortable action.
Read all about the next step here: > Standard Guitar Setups
Here's Mick reunited with his bass after all that work

