![Contact details [go to contact page]](shared/images/contact.png)
My Work
Guitar Re-finishing - Restoring a Kramer
Joe Reiser and his friend Jason Ho had been completely reinventing this guitar but got stumped when it came to the paint job and fitting the bridge, they gave up. A few years later Joe gave me a call with the idea of restoring it for Jason's birthday.
Unfortuantely after Joe and Jay had had a go at refinishing the guitar themselves it had been knocked and scratched about in the meantime causing some major dents. Joe asked for a full restoration on the Kramer to get it looking new again and then assemble it again with a new 2-point trem system like they intended
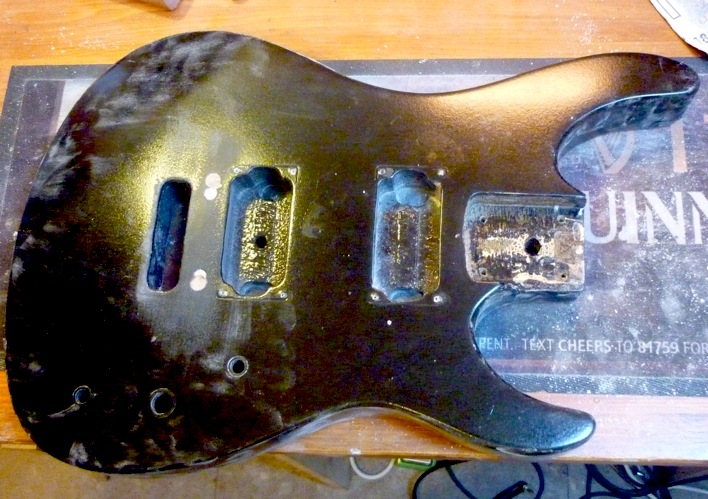
The existing paint job wasn't too bad, basically there was loads of black cellulose paint used for painting cars and they had started off not too badly but they had not flattened any of the layers down in between coats. I was able to flatten down their work and use that as the sealer coat for my paint job.
Heres the construction of a typical paint job:
- Wood
- Sealer
- Primer
- Colour coats 2-4x
- Clear coats 4-10x
As I was correcting some existing paint work the process was not exactly like that though.
Here's some photos of the original paintwork:
First job:
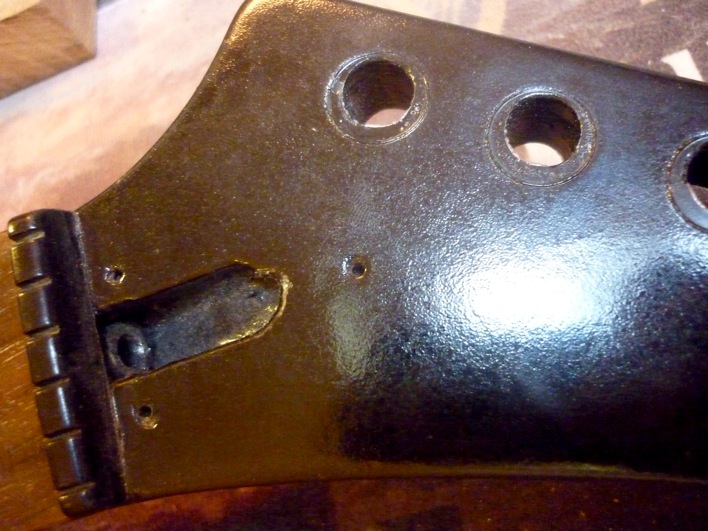
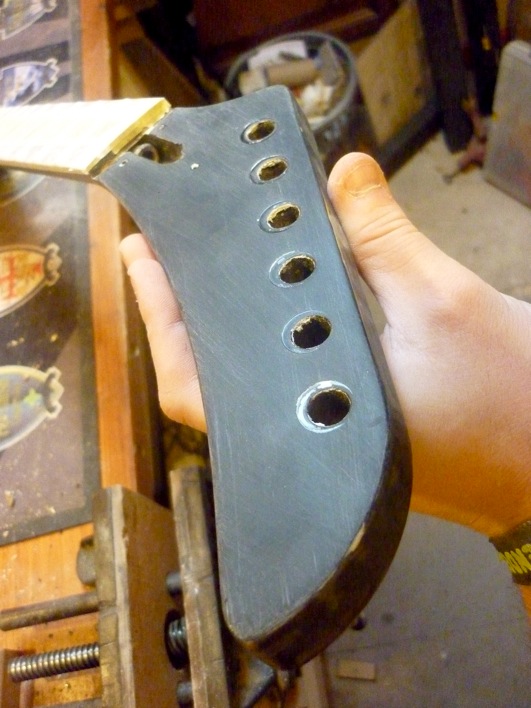
Drill the new bridge post holes. I also decided to cover the bridge bushings with wood filler with the aim of painting over the top of them.

Flatten the existing paint work to use as a base. I used hefty 180 grit paper to do this and mostly used a block too so that I only picked out the high spots on the paint. The idea was to flatten without cutting through to the bare wood. This was harder to avoid on the corners. I kept going until i could no longer see the glossier surface of the old paint.

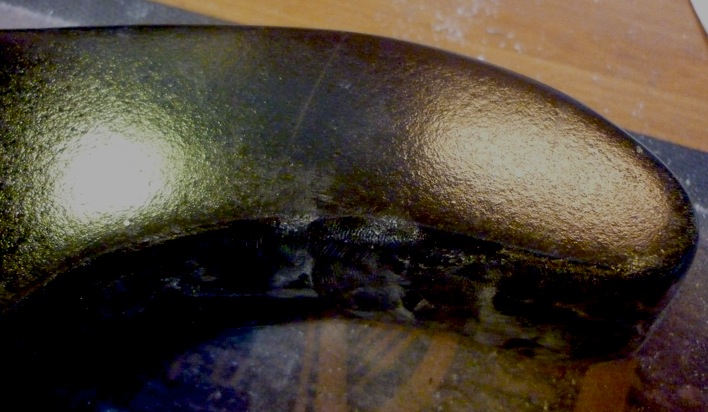
Repairing dents here with wood filler and watered down wood filler for finer scratches and dents. You can also use cellulose putty (as used in automotive painting).
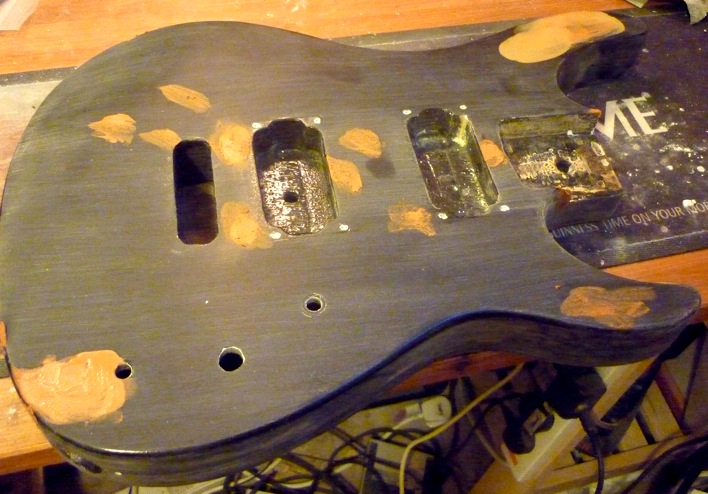

After the wood filler has dried thoroughly I sanded the excess off with 180 grit using a flat block. This leaves filler in the dents ready to be painted over.


I next sanded the whole body to 400 grit making sure I had removed all 180 grit scratches, this prepares the body for the paintwork

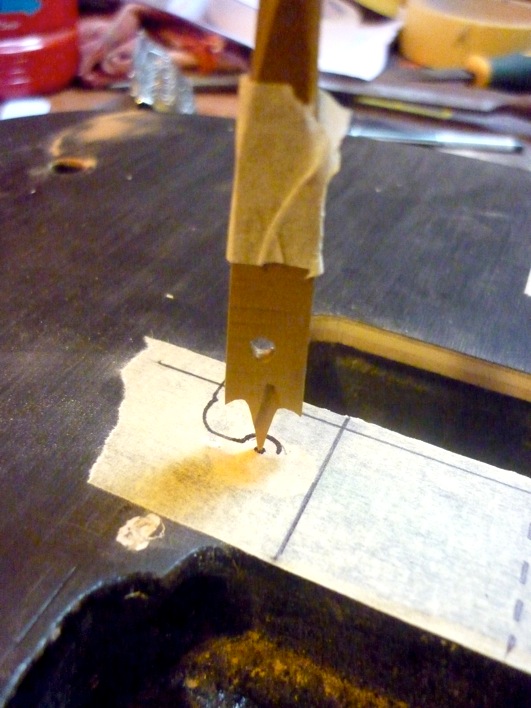
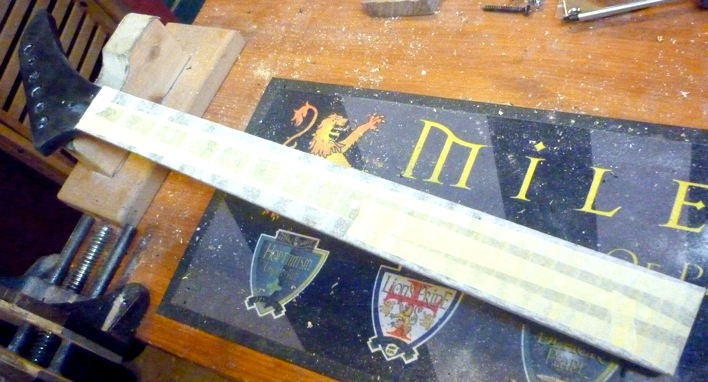
Time to mask off the fingerboard:
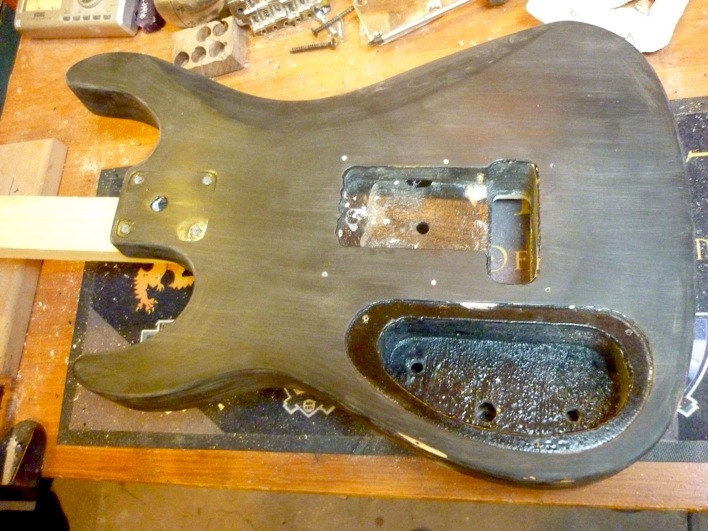
The next step is to seal the wood filler. As it's porous (fake wood), it'll absorb my really thin nitrocellulose laquer. I used a grey thick nitro basecoat to seal the filler and also its a handy colour to work with as I'll explain in the next step.

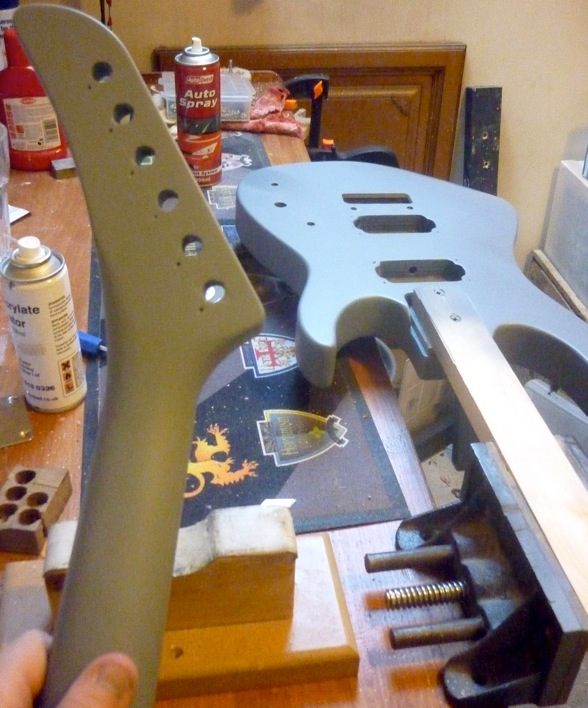
I used up a full 2 cans of this stuff so it's nice and thick - definately sealed!
After a weeks drying it was time to apply a "dust coat". The grey primer dries much faster than the quality nitro I use later on.
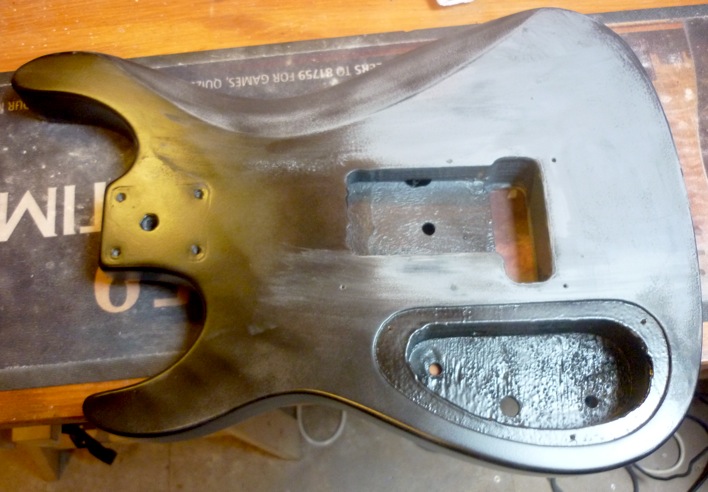
A dust coat is a thin layer of a different colour used purely to see how level the paintwork is. I spray a light coat of black over the dry grey primer and let that dry. The aim is now to sand off the black coat to reveal any scratch marks I might have missed.
It is crucial that the undercoats are flat - you will never get a high gloss scratch free final coat if the paint underneath it is not flat.

Each time I work on the body, the neck follows suit too... alot of sanding..........!
When I see no more black spots on the grey primer, I know that the surface is properly flattened - ready for the colour coats!

Here's the top side of the body with 3 coats and 4 in some places that were a bit thinner as well as a dirty great set of fingerprint on... As you can see lacquer does not dry flat. It develops these small lumps like orange peel.

Lumpy lumpy

This is similar to the stage in which Jay and Joe got to. What they didn't do is....

...Flatten down the colour coats.
I sanded the black coats down with 800 grit paper and a block as levelly as I could. It's very hard to do because when you reach the sharper edges of the guitar you're much more likely to sand through the colour coats and reveal grey primer again..! And it's extremely annoying when you do. If that does happen you've got to touch up the area with a couple of thick colour coats.
As far as applying the spray lacquer you have to make sure the paint does not run or dribble. If it does then you'll have to let it dry and flatten it again with a block thus destroying the surrounding area. This happened to me a few times during this project. The important thing to remember is slowly but surely it takes longer but carefully applied thin coats are much less likely to run. The thinner the coat also the faster it will dry too.
Nitrocellulose is a solvent when you spray it there's a mix of ink, lacquer and thinners. The thinners need to evaporate in order for the paint to cure properly. So the thicker the layer the more thinner you'll be trapping. (That's a confusing sentence...)
The enviroment you spray in too is very important but I'll have to explain about that another time because it time to apply some clear coats!
Once you've got the colour coats levelled and completely dried with ABSOLUTELY NO IMPERFECTIONS AT ALL you can begin to apply clear coats of lacquer. As soon as you do you are instantly rewarded with the first glimpse of how glossy it will be!
I forgot to take a photo of the clear coats applied before I buffed it unfortunately but basically I applied about 10 coats of clear lacquer. Each coat needs about 3 hours in between application and after that you'll have to let it dry for about 2 weeks. As always SLOWLY BUT SURELY does it. Try and rush it and put layers that are too thick and it'll run and you'll have to stop and wait for it to cure so you can destroy a few layers and sand the run out...........This did happen to me once again but I got there in the end plus a few blisters.
Time for buffing!


Unfortunately I'd run out of buffing compound so I did the guitar with T-Cut (used for polishing cars - It's a mild abrasive wax) applied with a buffing wheel and cotton rag and alot of elbow grease.
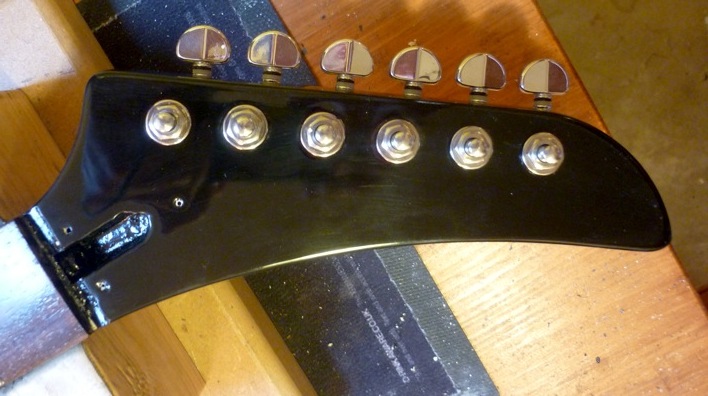
At this point the neck had over taken the body as I had a few problems with run throughs which obviously slowed it down but here it is a week later:


Cor! It's shaping up well
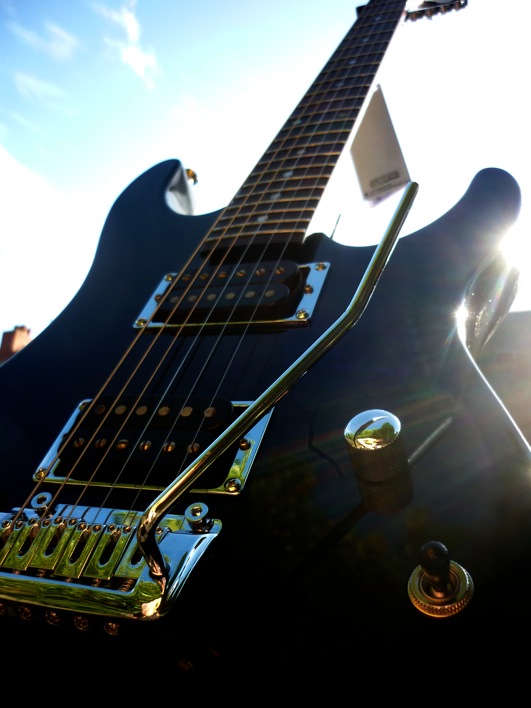
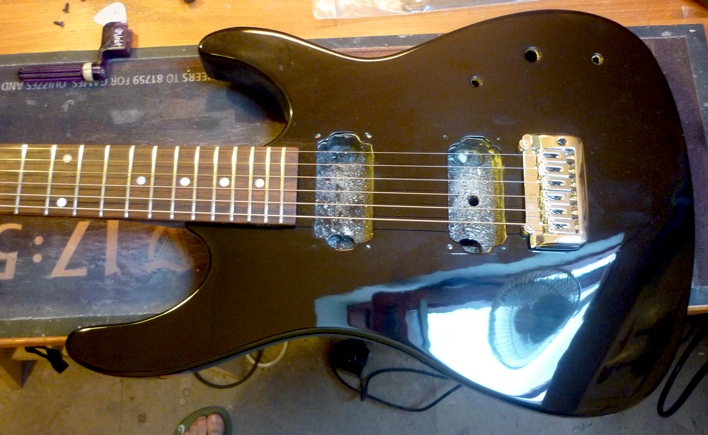
Now to take it outside for a quick show-off
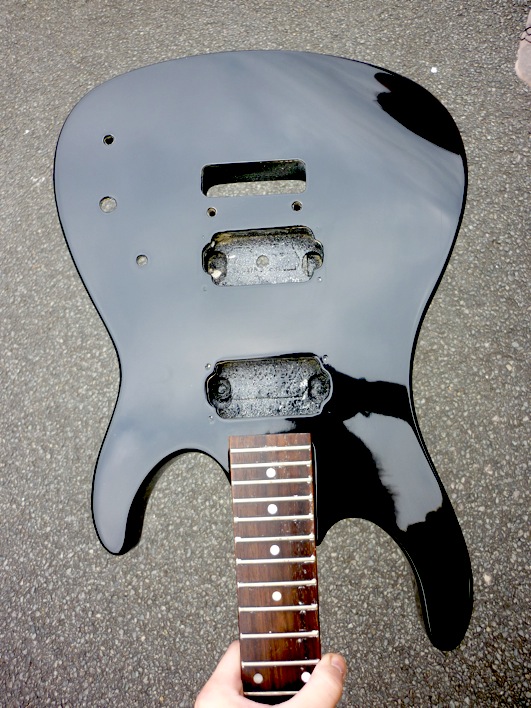


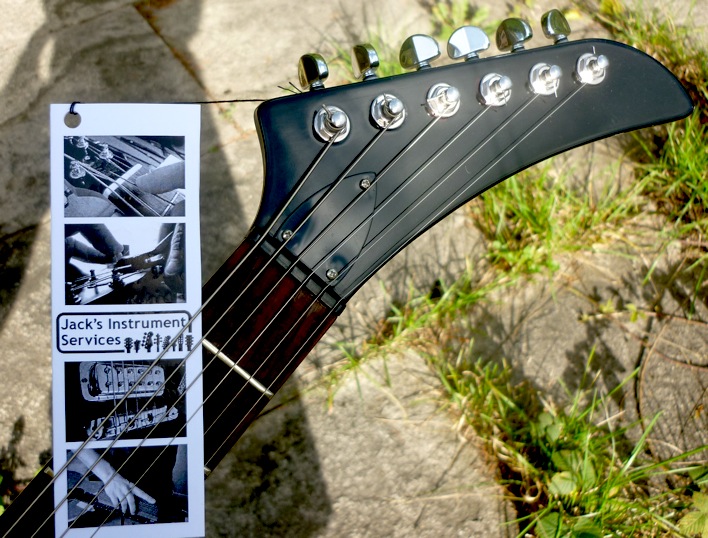
Enough messing around, lets start setting it up and get some strings on it before I scratch it!
Covered in obligatory fingerprints...
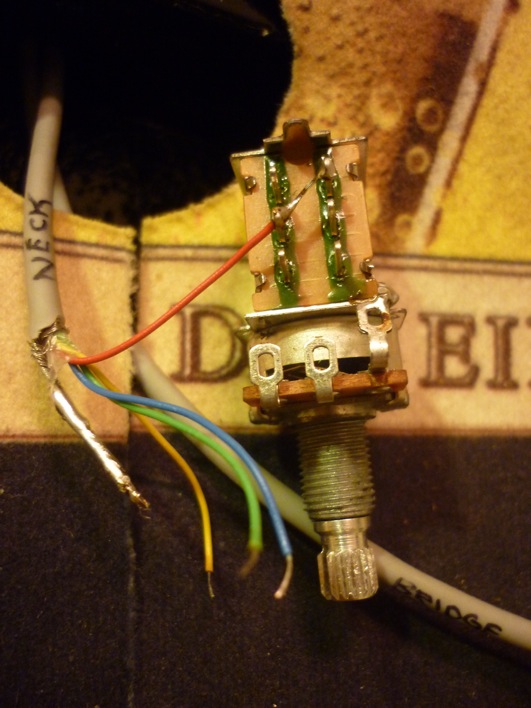
...After a fret dress and a setup the next little job, convert the humbuckers from 2 wire into 4 wire humbuckers so I can install the electronics mods in that Joe wanted


I have a soft spot for electronics so here we are - meet the family:

Here's one of the push-pull pots that'll allow each pot to be a switch too for Series/Parallel coil switching. Click here for audio examples of what the difference is.
And here it is!
Click Photos to enlarge