![Contact details [go to contact page]](shared/images/contact.png)
Acoustic Headstock Break Repair - Dave Balchin's Levin
Back to My Work <
 Dave Balchin had had an accident with his much loved Levin semi-acoustic guitar resulting in the headstock coming clean off. After replacing the guitar with a newer Takamine he left it to gather dust for a couple of years. After seeing it in the corner he decided that it was too much of a shame to let it go to the landfill - he gave me a call.
Unfortunately as the guitar had been left in two pieces for so long it was going to be a tough break to repair - they just didn't fit that well any more.
Don't forget to click on smaller photos to enlarge them

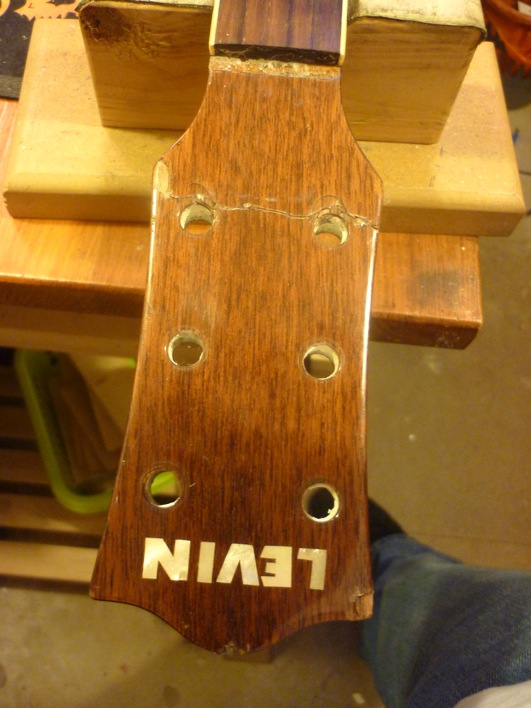
So here you can see the two parts forced together. Prior to taking these 3 photos I had doctored the edges removing some misplaced splinters and removing warped wood etc so that they would at least fit reasonably tightly.
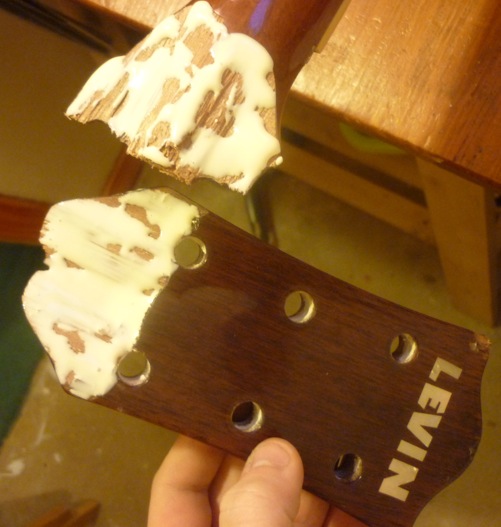
Once I was happy that the two pieces couldn't fit any better it was time to whack the Titebond out. It's always a good idea to use a little too much so that when pressed and clamped the glue will ooze into any crevices and make full contact with the 2 pieces of bare timber. If there's any area which aren't in contact with glue it's likely that there will be air trapped making for a weak join.

After a mad 5 minutes of clamping this is the result. I've protected the face of the headstock and back with 2 bits of MDF lined with cellophane packing tape. The reason for that is that it's impossible to stick wood glue to cellophane, if any of that excess glue ran onto bare MDF I'd have a very attractive bit of MDF on the front of the guitar!

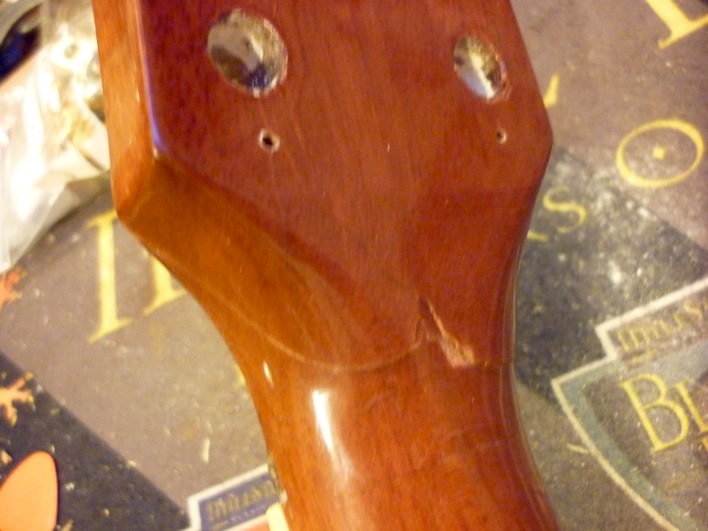
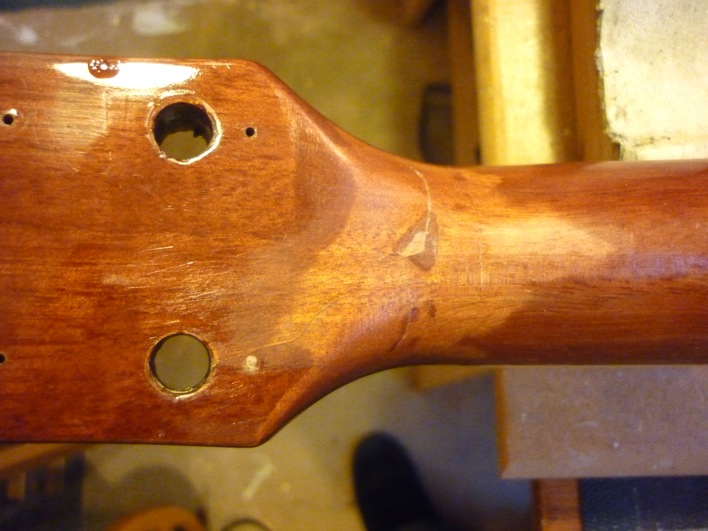
Fast forward 2 days. It's been clamped up there for while now and I'm sure that its set. This is what it looked like after a bit of clearing up. You can see the cracks which are left due to the pieces not fitting quite right......

...and a view of the back

Time to start smoothing down the quite obvious gap between the 2 parts with a flat block and some 180 grit paper. The lacquer on the face of the headstock is very thick luckily so I figured if I sand into it enough with some coarse paper it'll all work out level.
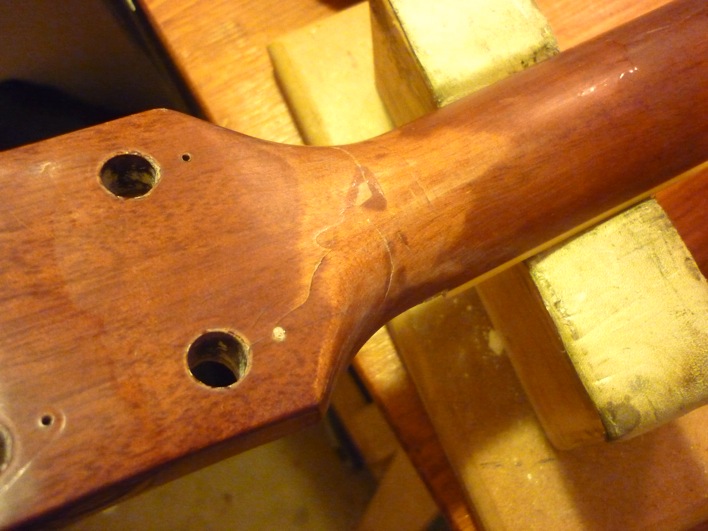
Here's a view of the back. You can see here that the lacquer was not as thick by a long way. The lighter coloured patches are where I've sended throught to the colour coats of lacquer - not bare wood. Either way, it had to be done so that I could get the join smooth.

After more sanding. See the big nasty chip on the right hand side of the faceplate? That small bit of rosewood had vanished a long time ago. Here you can see I've filled it with superglue layered up. This will do for a level fill; I plan to stain it at a later stage.
And here's the back prepared ready for spraying. I've sanded it flat to touch working down to 400 grit.

Mask off the fingerboard - Don't want to get black lacquer on there!

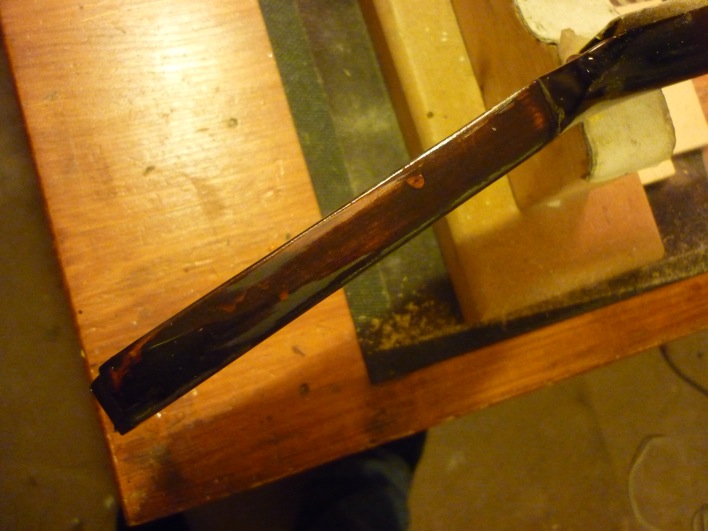
Here's me coating the join with black Nitrocellulose spray lacquer. Just a first initial coat

A second coat - now it's actually opaque which is what I was after to hide the join.
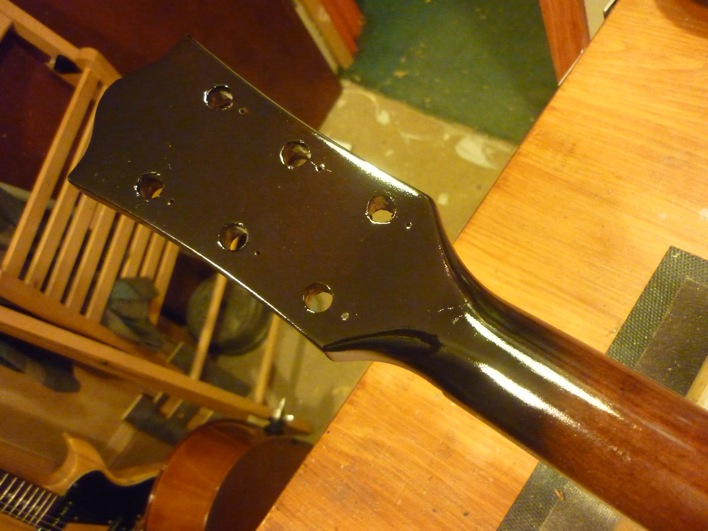
I decided it would look smarter if I sprayed the entire back of the headstock as well as the sides, only leaving the headstock face blank
Oops, I forgot to level the edges of the headstock before painting. Here I've flattened the first layer of black. The lumps are super glue runs. I used superglue to build up and fill the massive dents that were all over the headstock the biggest one being on the front right of the faceplate

and once again, the colour is re-applied. Here's the complete colour coats done on the headstock and neck this time completely flat and masking the nasty join!
Next it needs some clear coats
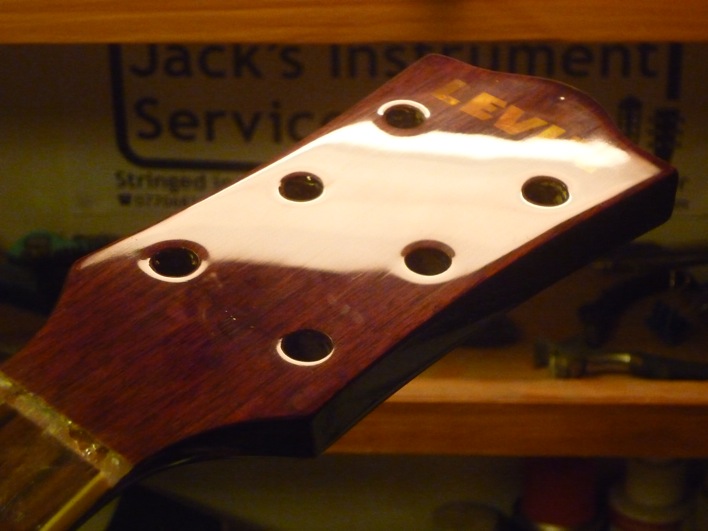
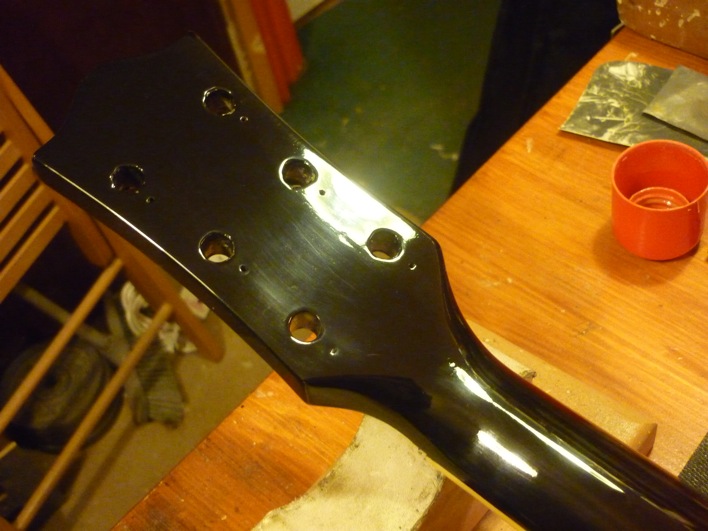
At last heres a shot of the face with all the clear coats applied. It's buffed up quite well too. If you look closely, you can see imperfections in the wood grain and the butt join of the repair.
I'm really happy with this one and I know Dave was too
Quick photo of the back to show that there's absolutely no lumps or bumps out of place here. It feels like nothing ever happened!
And finally re-assembled and setup!
I'm really happy with this one, you wouldnt know it'd been broken let alone broken and in 2 pieces for over a year!


