![Contact details [go to contact page]](shared/images/contact.png)
Re-frets with no Re-grets
Professional Re-frets done properly
When it comes to a job like a refret I think that it really is one of those jobs that is worth doing properly. Compared to others, I take extra steps to get the most accurate and reliable job done. I use the best fretwire from Jescar and Sintoms, known for their toughness and accuracy.
Get in touch today for your proper fret job with:
- Careful fret removal
- Accurate fretboard timber levelling and re-radiusing

- Large choice of new fret gauges in Nickel, Stainless Steel and new EVO Gold
- Careful fret slot repair (essential for guitars refretted more than once)
- New Frets glued and traditionally hammered in
- Fret level and fret dressing
- Tough weraing high quality fret wire stock used
- Original binding can be saved no problem
- Professional specialised and customised tooling
- All timber types taken on, binding, lacquer, and inlays are no problem!


Interested in getting your beloved guitar refretted? >Refret Pricing
Refretting a rare 1962 Gretsch 6119 Tennesean
This tired old Gretsch 6119 needed some loving. You will see how much work goes into one and why so many manufacturers cut corners and do a substandard fret job!
Here's what's involved: Click on the links below to skip on
>Remove old frets >Remove Zero fret and Nut >True the fretboard >Re-radius the fretboard >Prepare fret slots
>Test the fret slots >Prepare the frets >Trim the fret tangs >Install the Frets >Trim the fret ends
>Dress the frets >Dress the fret ends >Finish it up >String it up and set it up!
Here's a couple of before shots showing the fingerboard wear and fret wear!


First off, those old frets are have got to come out. These original frets have been in there since 1962 so will not come out easy!
Frets have barbs on the "tang" which help to keep the fret stuck into the rosewood fretboard but I have to pull them out!
Removing old frets safely
A little heat from a soldering iron will help to ease each fret out

I have ground down these end cutter pliers to help persuade frets out - invaluble

These frets are coming out very clean, so far!


Removing the Zero fret and Nut
It's the same treatment for the old zero fret too

Now I have to remove the old plastic nut which is more like a string guide, it's original too but OK so I will re-use it to keep the authentic look!
I have to score around the old lacquer with a craft knife to stop it from chipping


Naked, here's the fretboard in full without any frets in. I'm happy with how clean they have come out despite it's age.

Truing the fretboard
Next on the list is starting to flatten the fretboard. This is an important stage and a great opportunity!
I will get the fretboard flattened and trued which is essential for a flatter fret job. Once trued I will re-radius the top profile too with some specialist sanding blocks. This really cleans up the fretboard and removes the fingernail wear the the rosewood had in
First set it flat with s precision straight edge

...and set the truss rod. The rear of the neck is supported at this point so when I sand the top pushing down the neck stays where it should

Marking out the fretboard top surface. When the pencil lead is sanded off I know i have got it bang on

This is a 14" radius fretboard as told by my radius gauge

This is my precision flat sanding beam getting ready to meet the fretboard

And here's the result!


Here's the fretboard trued with all the fingernail wear and warping gone from the surface of the fretboard

Re-Radiusing
Next it's time for a precision radius after re-penciling

Done

Preparing the fret slots
I am very very picky about fret slots. The better the fit, the better the setaing of the fret will be. This is obviously important. I need the frets to stay seated well so that they stay flat (not humped to cause a fret buzz or dead spot) and also so they transfer the string's vibration to the timber. if the fret is loose in the slot it will absorb the string's vibration instead of sustaining it!
The Fret slots need to be deep enough and just the right width to house the frets and also cannot have any debris inside
As this neck has binding, this will make the task tricky!

This specialist mini saw saws out the bottom of the frets deepening them ready to accept the fret.
It has one blade which is push cut and one thet is pull cut

This pick grabs any dust, old glue or grime in the fret slot
Testing the fret slots

Having got this far I think it's a good idea to test the fret slots. This is a piece of the fretwire I will use bent in the middle and the barbs filed off. I can test the width and depth of the fret slots to see which may be wider or thinner than the next.
If the slot is too wide for the new fret I can use another specialist Stewmac tool to crimp the tang of the fret


Well..... That's the guitar ready!
Preparing the new frets

More specialist tooling! This is a home made fret bender.

The idea is that you over bend the fret wire by running it though this adjustable tool. When over-bent (tighter than 14" radius) the fret ends will tuck into the fretboard just right!
If I just hammered in a flat fret, the hammer would mildly bend the wire upwards making the ends pop up
Each fret is cut to length
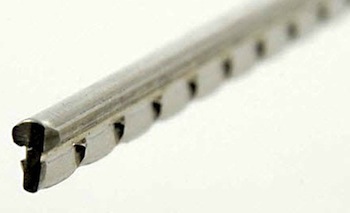
Trimming fret tangs
May I introduce my fret tang nipper

This chops off the tang from the bottom of the fret which is necessary to install the frets without disturbing the original binding

Installing the frets

I am gluing in the frets with a low viscoscity cyanoacrylate (the posh name for superglue). Cyanocrylate is a great glue for the job as the dry time is just right, it aerobically cures and does not shrink as it dries firmly cementing the frets in. It also dries stiff which is great for tonal transfer of string vibration
I like to hammer my frets in, my Stewmac fretting hammer is lovely to use and I like to feel the bounce. I suppose it's traditonal too!


I add a tiny overbend on the end of the frets just to keep it snug against the edges

Trimming Fret Ends
Chopping off the fret ends


Fret Dressing
You know the drill with fret dresses. If not click there!

Fret End Dressing

This is my specialist fret end file. It has a "safe edge" ground off so that it cannot harm the binding of edge of fretboard. With an artful flick of the wrist I round of the ends of each fret in quick succession to get a uniform end to the frets

Finishing up!


Scrape it Polish it

Adding almond oil to the fretboard
Finished


Now it's time for the setup (Standard Setup) procedure
It's a lot of work as you can see. Each of these steps is necessary though and has a clear benefit. You can see why many manufacturers cut corners on fretwork hey?
This is a very high quality fret job done with the best quality fretwire. These frets will stay put performing and sounding great!
Interested in getting your beloved guitar refretted? >Refret Pricing
Cheers - Jack
Back to My Work <